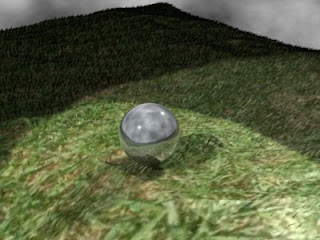
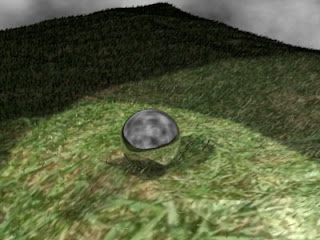
CHROME TUTORIAL #1
To fully see the measures of this process in your renders, you will need to have a textured plane and a horizon set up.
1) Hit the "F5" key or select the "Shading" button.
2) Select the "Material" button.
3) In the Material section, change your R,G, and B values to these levels:
R -0.90
G - 0.95
B - 1.0
4) Select the "Shaders" tab which is located to the right of the "Material" section.
5) Set the "Ref" (Reflection) to 1.0.
6) Set the "Spec" (Specularity) to 1.018
7) Set the "Hard" (Hardness of the Specularity) to 511.
9) Select the "Bias" button.
10) Select the "Mirror Trans" tab which is located to the right of the "Shaders" tab.
11) Select the "Ray Mirror" button.
12) Set your "Ray Mir" level to 0.85
13) Set your "Fresnel" level (Located under the Ray Mirror section) to 1.4.
14) Set your "Frac" (Located under the ray Mirror section) level to 1.25.
15) Select the "Ray Transp" button located next to the "Ray Mirror" button.
16) Hit the "F12" button to render your work.
(Note) Remember your object(s) is a reflective surface. Without anything to reflect, the shine is not there. Remember to put your object on a textured plane and give it a horizon or a wall.

CHROME TUTORIAL #2
To fully see the measures of this process in your renders, you will need to have a textured plane and a horizon set up.
1) Turn on Ambient Occlusion.
2) Select your object.
3) Hit the "F5" key or select the "Shading" button
4) Select the "Materials" button
5) Set R,G,B to Black
R = 0
G = 0
B = 0
6) Select the "Mirror Trans" tab
7) Select "Ray Mirror" button
8) Set "Ray Mir:" to 0.85
9) Hit the "F10" key or select the "Screne" button.
10) Under the "Render" panel enable the Ray Tracing by selecting the "Ray" button.
11) Under the "Render" panel enable the "Shado" button.
12) Under the "Render" panel set the OSA to 5
13) Hit the "F12" key to render your work.
(Note) Remember your object(s) is a reflective surface. Without anything to reflect, the shine is not there. Remember to put your object on a textured plane and give it a horizon or a wall.

Links to other "Chrome" tutorials.
File: Nepeterson chrome.png - http://en.wikibooks.org/wiki/File:Nepeterson_chrome.png
Enhanced Reflections with HDR Images by Kernon Dillon
www.blendercookie.com/2009/09/03/improving-reflections-with-hdr-images/
this makes no sense.. select matreial button then change rgb values there are none...
ReplyDelete