In this tutorial we will be learning how to use Ambient Occlusion. We will learn a quick start Ambient Occlusion process and it's options.
Ambient Occlusion is a lighting option, or rather a lack of lighting. It takes the faces of nearby objects and removes the light on other nearby faces making it look like shadows.
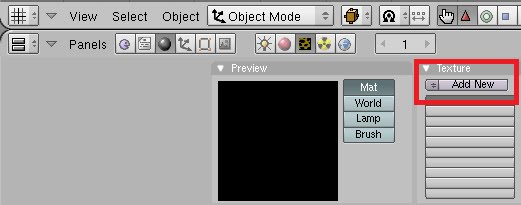
Quick Start Ambient Occlusion1) Hit the "F5" key or select the "Shading" button.
2) Select the "World" button
3) Select the "Ambient Occ" tab that sits next to the "Mist/Stars/Phisi" tab.
4) Select the "Ambient Occlusion" button.
5) Hit the "F12" button to render your work.
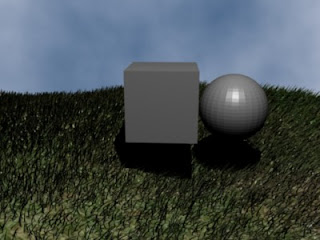
 (Top - Default Lighting) (Botton - Ambient Occlusion with no lighting)Options for Ambient OcclusionMax Dist:
 These levels select the length of your rays. By increasing your rays you will get a much harsher
ambient. By reducing the length of the rays you will get a softer
ambient and your work will render faster.
Use Falloff: If you select this button you will be able to set the strength of your shadows depending on their distance from another object.Gather Method button: this button has two option within. The first is
"Raytrace". This is one way of selecting the
occlusion gathering process. Your renders will take longer to render, but the quality will be higher. The other method is
"Approximate." This is an alternate way of selecting the occlusion gathering process. This will reduce the time it takes to render your work, but the quality of the occlusion is lower.
Add button: This button adds light and shadows to your work.
Sub button: This button subtracts light and shadows to your work.
Both button: This button lightens and darkens your work.
Plain button: (Plain Diffuse Energy) This button makes your light energy white.
Sky Color button: This button uses zenith and horizon colors for your diffuse energy.
Sky Texture button: This button provides a total sky texture for your diffuse energy when you
render your work.
Links to other tutorial for Ambient OcclusionBlender tutorial 6 : Ambient occlusion by 3DMacDaddy -
www.youtube.com/watch?v=RBo8UxMkW4YLearn how to enable Ambient Occlusion.
Video. AudioBits of Blender #34 - Ambient Occlusion by bitsofblender -
www.youtube.com/watch?v=H4OcZrVOykAVideo. Audio.


